Tag Archives: dairy free

Quinoa Coconut Cookies (Top 12 Free)

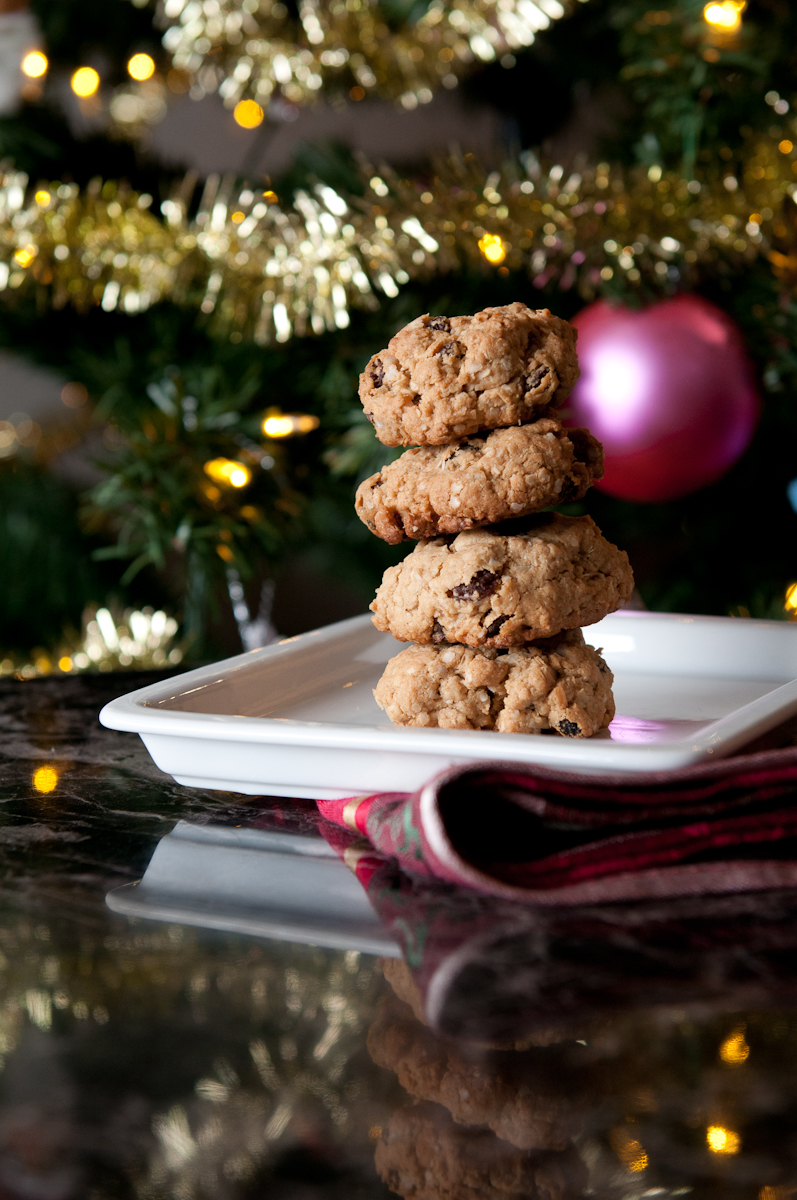
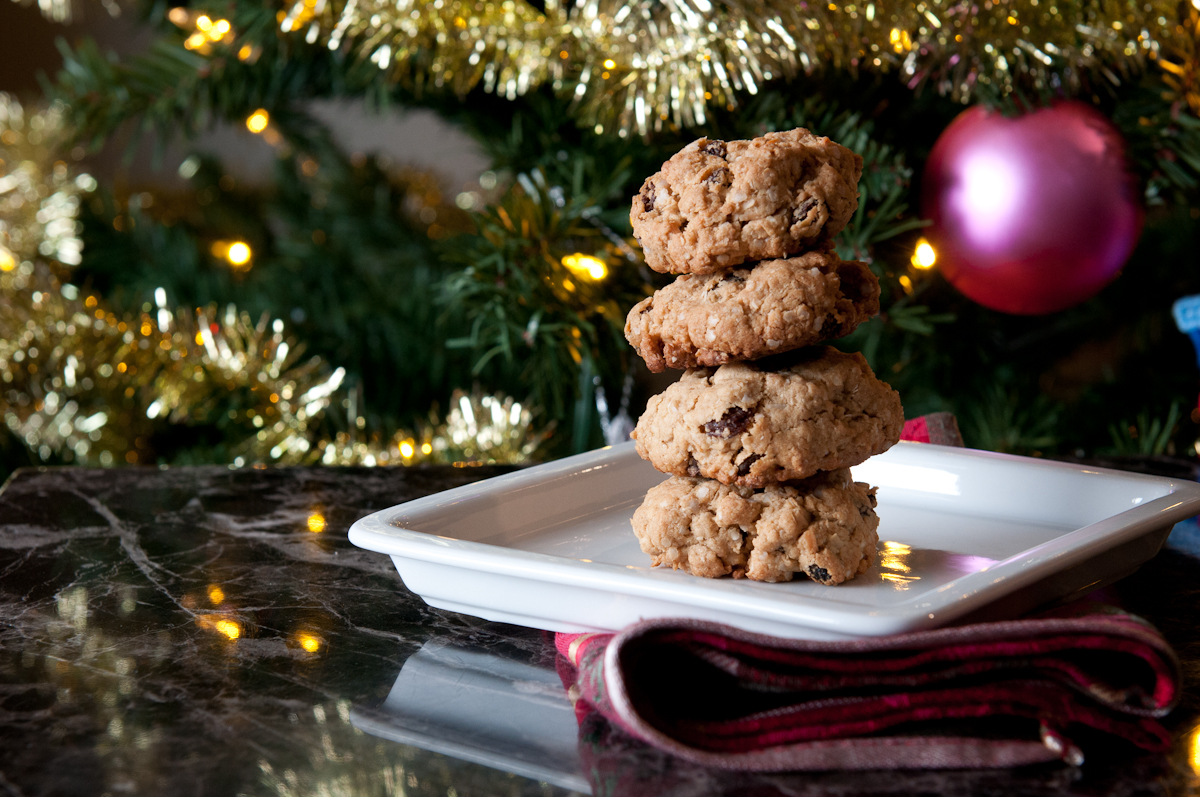
I wanted to make some cookies to help me enjoy life despite being so restricted on the elimination diet I am currently on. I decided to adapt my Gluten Free Vegan Oatmeal Raisin Cookies to see if they would work and thankfully they did!

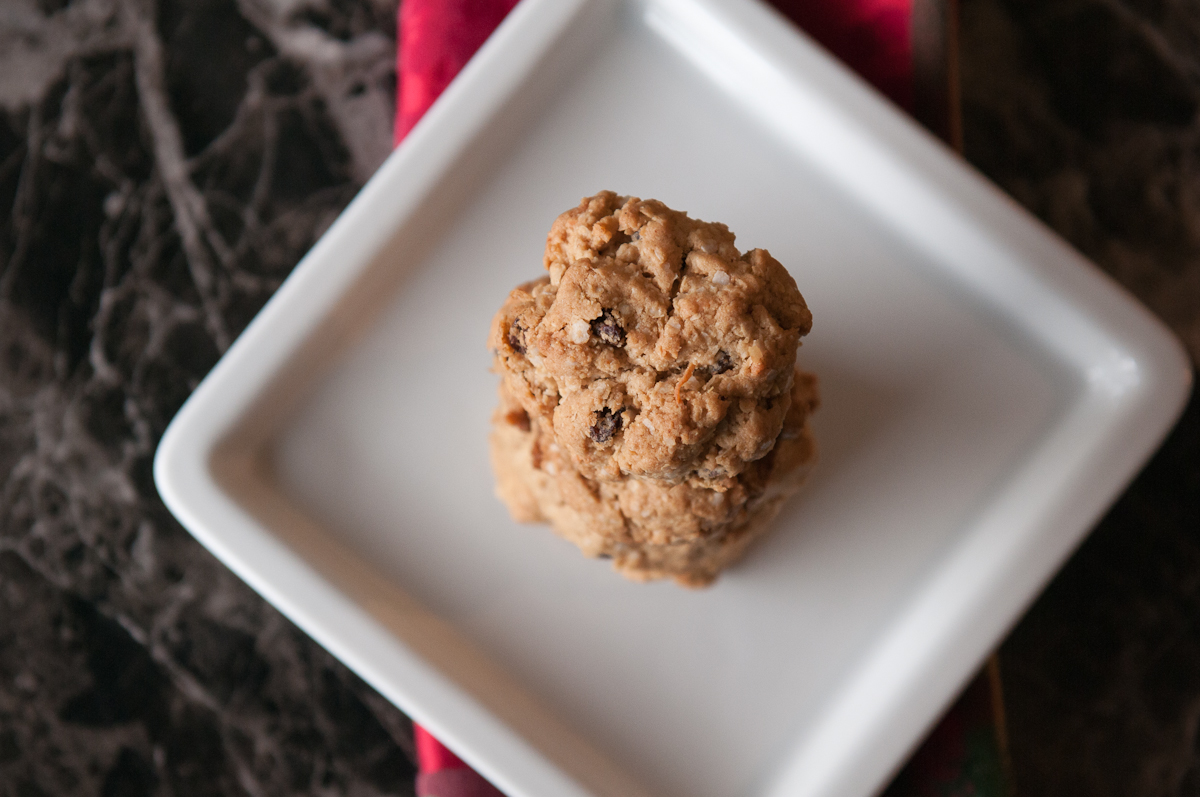
I made them one time without gums and they were tasty but very crumbly. Then after some research, I learned that you can use psyllium husk as a substitute for gums and this batch stuck together much better. I forgot to get true psyllium husk from the store, so I just opened my husband’s fiber capsules, which are pure psyllium powder. (Apparently, I’m a fan of use what you got on hand!)

Top 12 Free Quinoa Coconut Cookies

1/2 c. millet flour
1/2 c. sorghum flour
1/4 c. light buckwheat flour
1/4 c. potato starch
1/4 c. tapioca starch
1/2 tsp. psyllium husk
1 1/2 c. quinoa flakes
1 1/2 c. coarsely shredded coconut (or mixture of medium and flakes)
2 tsp. baking powder
1/2 tsp. salt
3/4 c. raisins
1/3 c. + 2 tbsp. canola or light olive oil
1/2 c. sunflower butter (125 g)
3/4 c. white sugar
1/2 c. brown sugar
1/2 c. hemp milk (literally just hemp hearts blended with water)
2 tsp. vanilla extract

  1. Preheat oven to 350F and line two cookie sheets with parchment paper.
  2. Mix together flours, psyllium husk, quinoa, coconut baking powder, salt and raisins.
  3. Cream together oil, sunflower butter and sugars.
  4. Add milk and vanilla and beat until smooth.
  5. Add wet ingredients into the dry and mix until smooth. The batter should be somewhat sticky.
  6. Spoon batter onto cookie sheets or if you want to roll batter into balls, place on cookie sheet and squish into disks. Balls should be around golf ball sized.
  7. Bake for about 15-20 minutes or until cookies are slightly browned.
  8. Remove from oven and let sit on sheet for about 5 minutes, then remove to cooling rack.
  9. Enjoy!

Makes 24 – 30 cookies depending on size and how much batter you eat. Cookies do decently in a sealed container on the counter for 2-3 days, but are best stored in the freezer.

My son helped me make and photograph these cookies and he was more than happy to enjoy the fruits of his labour!

Leave a comment

Filed under Baking

Gluten, Casein and Soy Free Christmas Cake

Christmas Cake-1

My mom loves Christmas cake. So after I discovered ghee, I have been making a version of my Grannie’s Christmas Cake for her the past few years. I’ve modified it to take out the parts I don’t like and to make it a bit (emphasis on the bit part) healthier than the traditional version. First, I have removed the candied citron peel as ain’t nobody got time for that (aka. it’s gross). Then, I replaced some of the usual candied fruit for unsweetened dried fruit. Third, I douse it in way more brandy than the original recipe called for as it needs to stay moist of course!

This cake is super rich – it’s great when you eat it just because, but it is amazing when you eat it while skiing or while outside in cold weather. I think it’s because the ghee and brandy to help keep you warm! 😉

Gluten, Casein and Soy Free Christmas Cake

4 oz. currants
2 oz. apple juice sweetened dried cranberries
6 oz. sultana raisins
4 oz. dried figs, diced (I cut them in half lengthwise and then slice them into three sections)
4 oz. glace cherries, cut in half
2-3 rings of dried, unsweetened pineapple cut/teared into pieces
2 oz. blanched slivered almonds
1/4 c. starch

4 oz. Ghee (it’s casein free!) (Or 6 oz. butter)
2/3 c. sugar
2 eggs
1 egg replacer (I made mine with Almond milk, but feel free to use any dairy free milk)
2 tbsp. brandy
1/2 c. each brown rice flour, sorghum flour and tapioca starch
1/4 c. millet flour
1 tsp. xanthan gum
1/2 tsp. baking powder

Extra brandy

  1. Preheat oven to 250F and place a bowl or pan full of water in the oven.
  2. Take an 8″ springform pan and line with parchment paper and wax paper sticking 2″ above the edge of the pan (parchment paper on the outside – to do this, I cut out a circle of each for the bottom and then a long strip of each that is 2″ wider than the height of the pan. The length is pi*d, and for my pan, it was around 24″. You do want a bit of overlap, so if it’s too long, that’s okay!)
  3. In a large bowl, combine all the dried fruits. Add the starch and toss until the fruit is covered, breaking up any clumps.
  4. In a stand mixer, cream the ghee and sugar.
  5. Add eggs one at a time and beat until combined.
  6. Add the brandy and mix until combined.
  7. Sift in the flours and beat until a smooth batter forms.
  8. Remove from mixer and stir in the dried fruits until fruit is evenly distrubuted in the batter.
  9. Scrape in lined pan and smooth out.
  10. Bake for 3 hrs or until an inserted toothpick comes out clean.
  11. Remove from oven and let cool on a rack. Don’t remove from the pan.
  12. Once cool, take a toothpick or other thin pointy object (I used one of those turkey skewers) and poke holes all over the cake. Take a 2 -3 tbsp. of brandy and pour over cake. Place cake in a ziploc bag.
  13. Repeat a couple times over the next few days. The cake can be stored on the counter for a few days on the counter and longer in the fridge. It freezes very well, just make sure you brandy it at least twice and wrap in two ziploc bags.
  14. Enjoy the rich goodness!

Note: When you thaw it, douse it in brandy. Trust me, it’s worth it. 🙂

Are you a Christmas Cake lover or hater?

Leave a comment

Filed under Baking

SRC: Making Miracle’s Mushroom Sausage Ragu

Making Miracles Mushroom Sausage Ragu-5For this month’s Secret Recipe Club, I was paired with Rebekah of Making Miracles. Rebekah is a surrogate mother (which is awesome!) and has two kids of her own. Unfortunately, her 17 year old son recently had a stroke and so I ask you to spare a moment to pray for his recovery! She focuses on making food that is “quick, easy and family friendly!”

Making Miracles Mushroom Sausage Ragu-3

Rebekah has tons of delicious recipes, many of which Mr. Bean asked me to make: BBQ Chicken Salad with Cornbread Croutons, Crockpot Shredded Beef, Party Beans, Gourmet Mushroom Risotto and Perfect Summer Sandwich.

Making Miracles Mushroom Sausage Ragu-4

She has a large selection of baked goods, but I was visiting Mr. Bean in Red Deer for the weekend, so I had no access to my usual baking and gluten free flour supplies. I chose her Mushroom Sausage Ragu and it did not disappoint! It was fairly simple and very delicious, making it a perfect dinner. We ended up making about double her original recipe, which made excellent left overs.

Making Miracles Mushroom Sausage Ragu-1

Mushroom Sausage Ragu

1 lb gluten free mild Italian sausages
2 tbsp. Olive oil
1 large onion, finely diced
4 c. Chopped fresh mushrooms
2 – 3 large cloves of garlic, minced
1 – 798 mL can of diced tomatoes, partially drained with juice reserved
3 tsp. Italian seasonings
Salt and pepper to taste
Fresh parsley, finely chopped
16 oz. pasta (I used gluten free penne)

  1. Remove sausages from skins, break into pieces and fry up until browned in a large skillet.
  2. Remove from skillet into a paper towel lined bowl. Wipe out skillet.
  3. Add oil to skillet and sauté onions and mushrooms until onions are soft and mushrooms are cooked through. Add garlic and sauté for a minute.
  4. Add diced tomatoes, Italian seasonings and salt and pepper. Simmer until most liquid starts thickening up. Add more liquid if desired.
  5. Meanwhile, cook pasta according to instructions.
  6. Serve Ragu over pasta and sprinkle with chopped parsley.
  7. Enjoy!

Making Miracles Mushroom Sausage Ragu-2

Please check out the rest of Group D’s recipes by clicking the link below!

9 Comments

Filed under Food

SRC: Fearless Homemaker’s Chocolate Almond Pear Tart

Fearless Homemake Chocolate Almond Pear Tart-2 For October’s Secret Recipe Club, I was paired with Amy of Fearless Homemaker. Amy lives in Nashville, has a super cute daughter and tons of cute aprons!

Amy has TONS of delicious recipes like Bacon-Wrapped Manchego + Mango Chutney-Stuffed Dates, Brussel Sprouts with Pancetta and Garlic, Bete Noire (Flourless Chocolate Cake), Peanut Butter Chocolate Chip Bars and Chocolate Avocado Pudding.

I also made her One Pot Tomato Basil Chicken Pasta but didn’t have the opportunity to take photos, so I also made her Chocolate Almond Pear Tart.

Fearless Homemake Chocolate Almond Pear Tart-3

The tart turned out really well and in my not-so humble opinion, is a perfect fall dessert! Mr. Bean kept commenting how good it smelled while I was making it and while it was baking and the end product definitely didn’t disappoint! It was super tasty and had a perfect light texture!

Since it’s naturally gluten free, I only made a few modifications. I used almond flour instead of grinding whole blanched almonds and reduced the amount of sugar to 2/3 c. from 3/4c.

Fearless Homemake Chocolate Almond Pear Tart-4

Gluten Free Chocolate Almond Pear Tart

Scant 1 c. ofAlmond Meal/Flour
2/3 c. sugar
3 large eggs
1/2 c. dairy free margarine (or butter) + extra for pan
1 /3 c. cocoa powder
1 tsp. vanilla extract
1/2 tsp. salt
2 pears
Lemon Juice
2 tbsp. Apple Jelly

  1. Preheat oven to 350F. Grease a 9in removable bottom tart pan with margarine.
  2. In the bowl of a mixer, mix together the almond flour and sugar.
  3. Add eggs, margarine, cocoa powder and vanilla extract and beat until smooth.
  4. Scrape into tart into pan and smooth out.
  5. Peel pears and cut into 12 pieces. Rub with lemon juice to prevent discolouration.
  6. Arrange pear slices on chocolate mixture, so they slightly overlap. Don’t press in.
  7. Place on baking sheet and cook for 45-50 minutes until tart is puffy and a toothpick inserted into the centre of the chocolate mixture comes out with only a few moist crumbs. Let cool completely.
  8. Heat jelly in microwave or stove until liquified. Gently brush pears with jelly. Let set for at least 20 minutes.
  9. Remove tart from pan and serve.
  10. Enjoy!

Fearless Homemake Chocolate Almond Pear Tart-1

What is your favourite non-pumpkin fall dessert?

30 Comments

Filed under Baking

SRC: Palatable Pastime’s Avocado Bacon Pancakes with Maple Syrup

Palatable Pastime Avocado Bacon Pancakes-2

For August’s Secret Recipe Club, I was paired with Sue of Palatable Pastime! Sue has tons of amazing recipes like her Autumn Apple NogLebanese Red Cabbage SaladAsparagus with Crispy Garlic Proscuitto and Bubble and Squeak.

Palatable Pastime Avocado Bacon Pancakes-1

I chose to make her Avocado Bacon Pancakes with Maple Syrup! She has a few different recipes with the avocado/maple/bacon flavour combination, like her maple bacon guacamole, all inspired by some avocado toast with bacon and maple syrup!

I was a bit skeptical at first, but the flavour combination worked out pretty well! I made a few modifications – I made the pancakes gluten and dairy free to make them more “me friendly”. My avocado wasn’t as ripe as I would have liked, but it still worked.

This recipe makes 6 pretty thick pancakes. They had good texture and weren’t dry at all!

Palatable Pastime Avocado Bacon Pancakes-4

Gluten and Dairy Free Avocado Bacon Pancakes with Maple Syrup

Makes 6 pancakes

3/4 c. almond milk
1/2 tsp. apple cider vinegar or lemon juice
2 tbsp. olive oil
1 large egg
1 1/2 tbsp. sugar
2 tsp. baking powder
1/2 tsp. salt
1/2 c. cooked, crumbled bacon bits
1 c. GF Flour (I used 1/4 c. each of tapioca, white rice, sorghum, 2 tbsp. of sweet white rice and 1 tbsp each of millet and cornmeal)
1/2 tsp. xanthan gum
1 ripe avocado, diced

  1. Preheat griddle to 350F and lightly oil (A bit of oil on paper towel).
  2. Measure out almond milk and add vinegar to create buttermilk. Stir and let sit for a few minutes.
  3. In a small bowl, whisk together flour and xanthan gum.
  4. In a separate bowl, whisk together “buttermilk”, oil and egg.
  5. Add sugar, baking powder and salt and whisk until combined.
  6. Add flour and bacon bits and stir until batter is smooth.
  7. Fold in avocado pieces, being careful not to mash them.
  8. Scoop out 1/2 c. batter onto griddle for each pancake. (Sue recommends to lower griddle temperature at this point, but I didn’t and they still worked out fine.) If pancakes need to be sculpted on the griddle, add more milk so the batter is thin enough to flatten out slightly itself.
  9. When pancake forms bubbles on top and you can get a spatula beneath without trouble, flip the pancake and brown the other side until the pancake is springy but firm to the touch.
  10. Enjoy warm with dairy free margarine (butter) and lots of maple syrup!

Palatable Pastime Avocado Bacon Pancakes-5

Please check out the rest of Group D’s recipes by clicking the link below!

11 Comments

Filed under Food